Set Up Your Space

Where you film matters! When choosing a space for filming, you’ll want to select a spot that has ample light, no audio or visual distractions, and a professional appearance that reflects the topic that you’re about to teach.

In this article:


In this lesson from our teacher training class, Teach on Skillshare: Plan, Publish, and Promote an Engaging Class, Top Teachers Aaron Palabyab, Desdemona Dallas, and Fred Trevino review a few things you’ll need before you start filming, including getting the right equipment and setting up your space.

Find Your Light

Good lighting will make the biggest difference in the quality of your videos, but an expensive lighting setup isn't necessary. Find a nice spot near a window that offers a balance of natural light. After you've identified a location with soft, natural light, experiment with framing and positioning so you’re standing beside the window, not in front of it. Standing a few feet from your background can help avoid shadows and create a pleasing depth of field.

If you don’t have access to a space with ample natural light or you’re shooting on a dark day, you can also use artificial lights.
If the lighting isn’t right in your creative workspace, you may need to fake it. Pick a location in your home that has the absolute best lighting and simulate a studio or classroom environment, using furniture, plants, artwork, and other props as you choose.

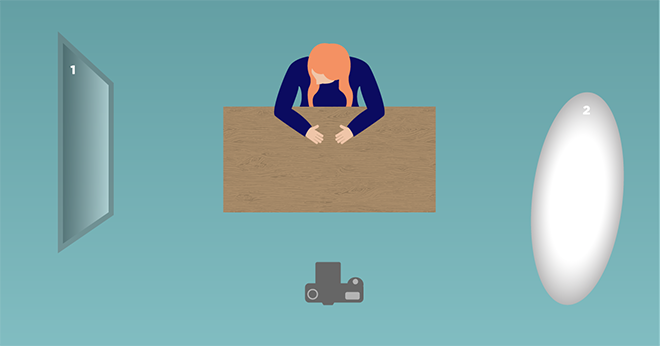
Lighting-diagram.png

This diagram shows a recommended setup to make use of natural light coming through a window. To ensure you’re lit evenly, position yourself so that the window (1) is to your side and not directly behind you — you don’t put yourself in silhouette. This will cast a gentle shadow or “falloff” on the opposite side of your face. If you find that the falloff is too dark, use a reflector, white poster board, or sheet (2) to bounce the light from the window and add some illumination to your face.
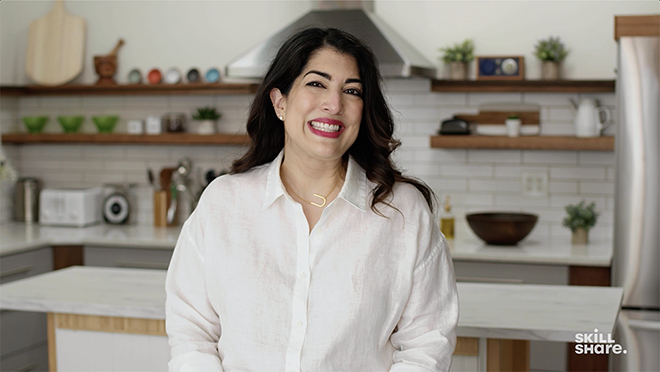
In Craig Whitehead’s class Street Photography Composition: 5 Techniques for Standout Photos, the falloff on his face is more dramatic, perhaps due to the higher contrast in the background. On the other hand, Umber Ahmad’s Baking Basics: Make Perfect Pastries Every Time was shot in a warm kitchen and the falloff effect is more subtle.

Remove All Distractions

If you’re shooting a talking head video, make sure the space you’re filming in reflects and enhances the quality of your class. Remove or conceal any furniture or clutter that might appear distracting on camera.

There’s nothing worse than a great lesson with a distracting buzz in the background! Before you settle on the space where you plan to shoot your videos, sit in silence and listen for any audible hums or noises. You may need to turn off any electrical appliances you have nearby, or experiment with a new location to minimize the noise.

Dress Your Set

Set the mood for your class by preparing and stylizing your physical set — whatever will be visible on camera for talking head videos — with props.

Your set should reflect your topic so it’s clear to students what you’re about to teach. Don’t be afraid to use the “tools of your trade” as props and find a way to stylize them so they look good on camera. For example, for a watercolor class, you might include a jar of brushes and your paint palette; for a graphic design class, perhaps you’re positioning your laptop strategically in the frame. Additional props such as examples of your work, plants, books, posters, or other objects add visual interest to your set.

You might also want to think about where and how you place those props in your space in preparation for filming. Be intentional to create a sense of depth in the frame, highlighting the foreground, middle ground, and background.

See a few examples from some of our teachers below:
Modi-set.png

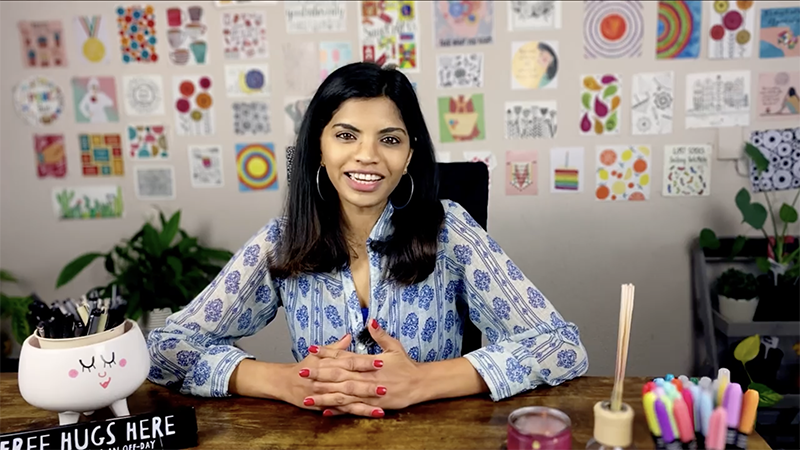
Top Teacher Neha Modi completely simulated a studio environment for this class, Daily Meditative Art Practice: Pen, Paper, and Patterns. She hung examples of her work in a loose grid on the wall behind her to add color to the space. The props on the table in front of her — a container of colorful markers, a scent diffuser, and a couple of personal items — echo the topic of her class.

Cooke-set.png

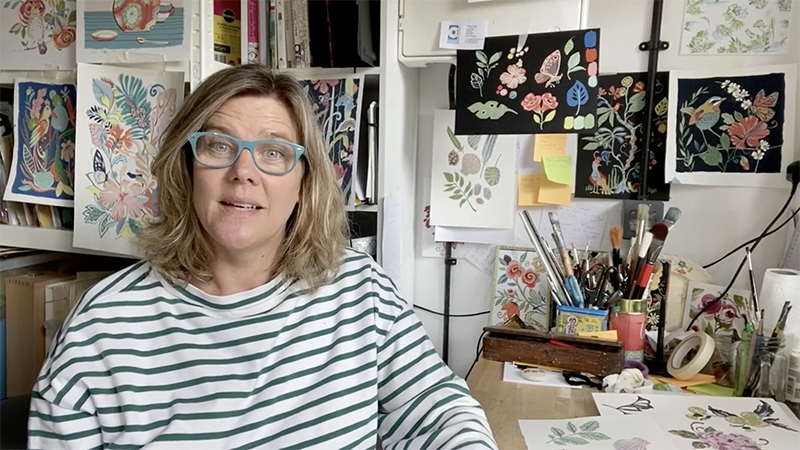
Top Teacher Kate Cooke shot this class, Adventures in Gouache: Painting and Pattern Making Techniques, in her studio where she has a lot of natural light. While there’s a lot going on in the frame, it’s still carefully stylized and composed.

Nwakalor-set.png

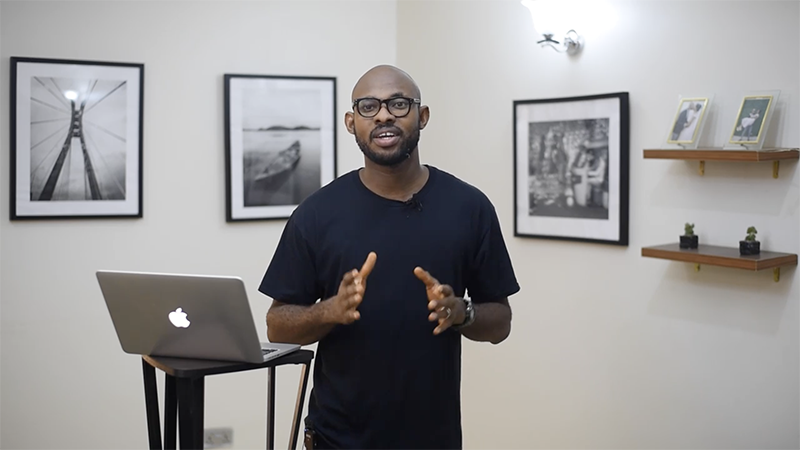
Top Teacher KC Nwakalor uses a clean, minimal set for his class, Photography Fundamentals: Creating Powerful Photos with Compositional Techniques. Here he’s standing in the space, using a stand to balance his laptop at his side. A couple of framed photographs and some decorative items adorn the walls behind him.

Staniloff-set.png

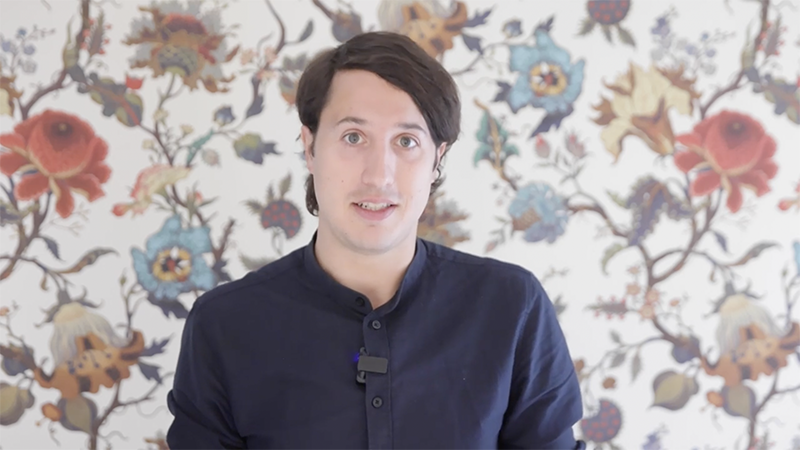
In his class, Level Up Your Interior Photography: How to Shoot and Edit Like a Pro, Alex Staniloff goes for a simple maximalist approach: wallpaper! The floral pattern adds contrast and visual interest to the background and is an excellent complement for his class topic: photographing home interiors.